
Decomposing the process for forcing logins with the MS Authenticator app
My Zen mentor Alan Watts might say that the Microsoft Azure platform is “a source of marvelous accidents.” More pointedly, my high school programming teacher (We programmed Basic on a Wang 2200B, BTW) used to famously say “It’s fun when it works.” He never told us what it felt like when it didn’t work.
But we figured it out.
Many times, when rooting around in Azure’s Active Directory implementation, I’ve felt as though some things work or don’t by accident. But that’s me. So in service to “It’s fun when it works,” I wanted to show an end-to-end process that configures an Azure App Service web site that forces user authentication through Azure AD with MFA, and MFA through the Microsoft Authenticator app at that. (In service to brevity, I’ll try to keep the instructions here brief. Check the links for the foundational information if you need it).
In short, we’ll be creating a garden-variety App Service website, making Azure AD aware of it as a registered application, then locking down the app so that only logged-in users who’ve gone through the MFA process can access the App Service website. Here we go:
- Prerequisite step: You’ll need an Azure subscription that is running Azure AD Premium. For now, the trial version will suffice. This is required in order to be able to create a Conditional Access Policy for the application
- How to enable Azure AD Premium
- For prototyping purposes, create a non-admin test user in your Azure AD tenant. (We will enable MFA for this user individually and test the directory’s MFA functionality later)
- How to create an Azure AD user
- Create an Azure App Service web app and verify that it’s available anonymously (I used .NET Core)
- How to create an Azure App Service web site with .NET Core
- Register the web app as an Enterprise Application with Azure AD.
- From the Azure Active Directory blade, choose App Registrations and then click New Registration
- Enter any string for the user-facing display name.
- For the authentication choice, I used Accounts in This Organization Directory Only. (NOTE: While you can choose to open the app to personal Microsoft accounts, aka “The Whole World,” this isn’t recommended due to “temporary differences in supported functionality,” and you won’t find it as a clickable option to switch to later once the app is registered, though you could edit the App Manifest)
- For the Redirect URI, set it to the base address for the App Service website you created previously (The one ending in azurewebsites.net), with https:// as the protocol
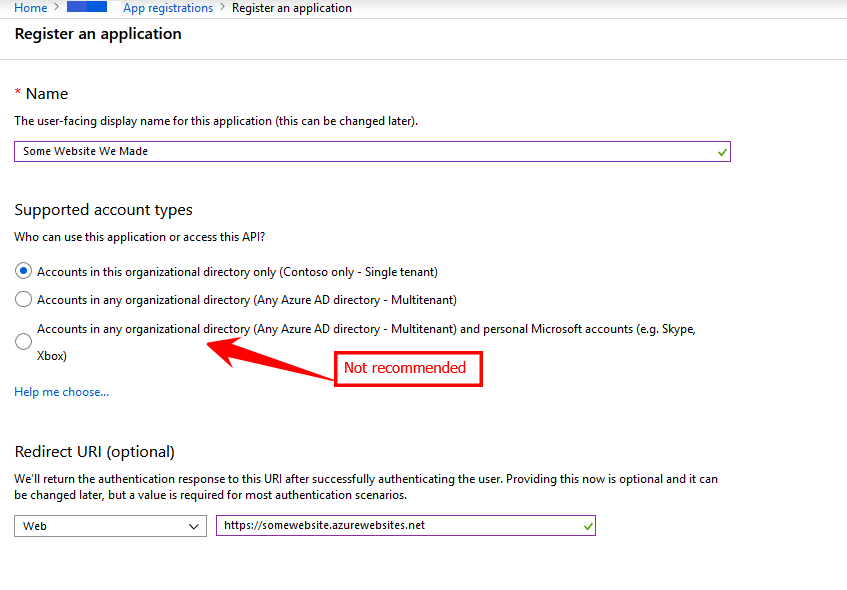
- Save and wait for the App to be registered.
- Add configuration information to the registered application.
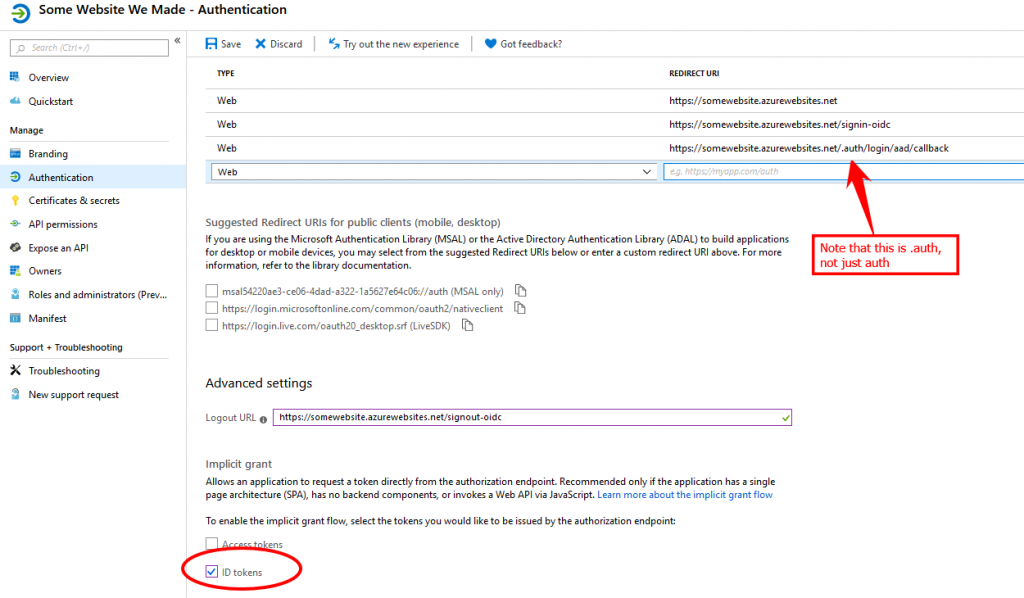
- From the App Registrations node in the Azure Active Directory blade, find your app and click the Authentication properties.
- Add 2 more Redirect URI values
- Add one with /signin-oidc appended to your base address
- Add another with /.auth/login/aad/callback appended to your base address (Full disclosure: I haven’t researched why this works for me, and it may be unnecessary, but when I have it I get rid of mismatched reply URL errors. And if it doesn’t do anything, who cares? No harm, no foul)
- Create a Logout URL with your base site address and /signout-oidc appended to it
- Check the ID Tokens checkbox in the Implicit Grant section
- Save your changes.
- Create a Conditional Access Policy for the application
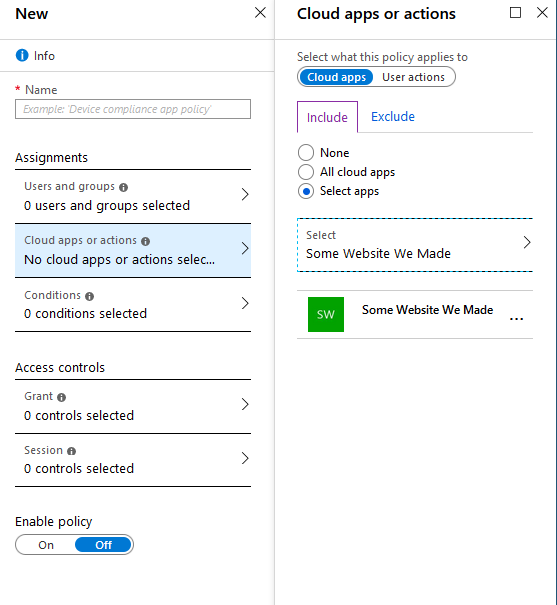
- From the Azure Active Directory menu, choose Enterprise Applications, then Conditional Access, then New Policy.
- In Cloud Apps or Action, choose Select Apps and the pick the app we previously created.
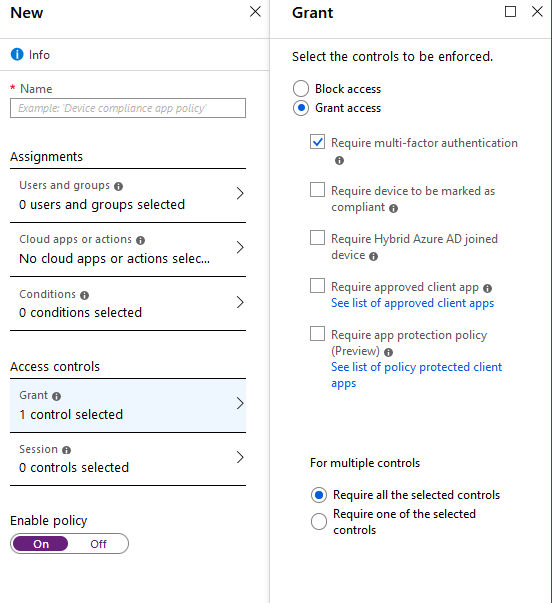
- Under Access Controls, choose Grant, then under Grant Access, check Require Multi-Factor Authentication.
- Make sure to flip Enable Policy to On.
The policy will require a few minutes to be applied.
- Force users to be authenticated to the App Service app
- From the App Services menu, find your web site
- From the Authentication/Authorization blade, flip App Service Authentication to On.
- Under the “Action to Take…” dropdown, choose Log in With Azure Active Directory.
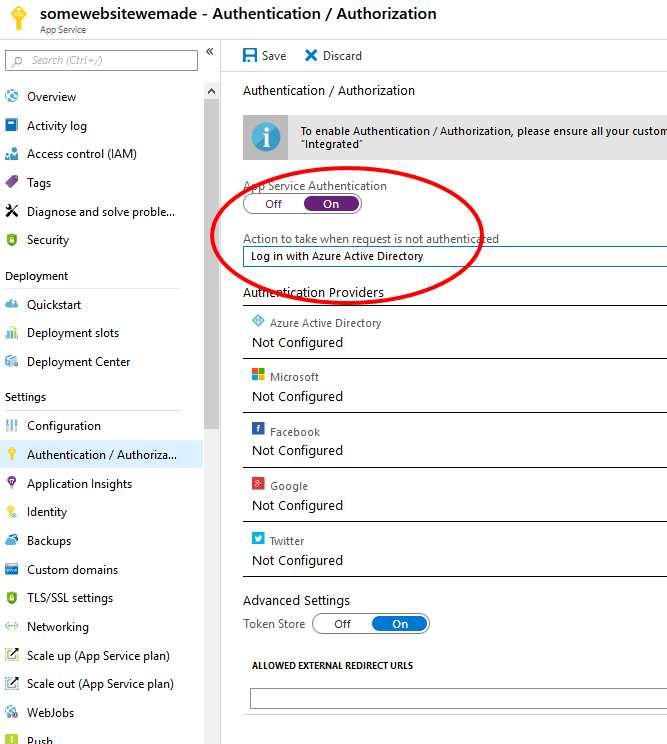
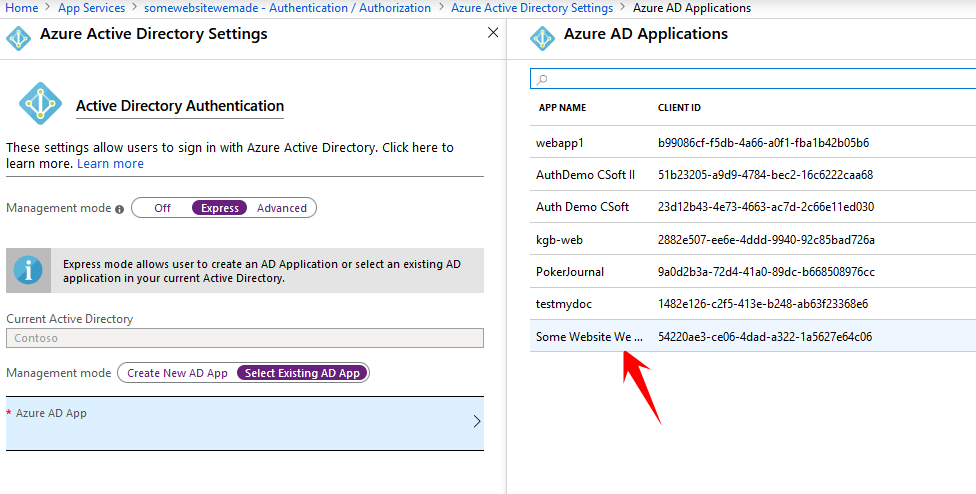
- Click on Azure Active Directory in the authentication providers list, then choose Express configuration.
- Choose the Enterprise App we configured earlier, and save your changes.
- Enforce MFA with Microsoft Authenticator
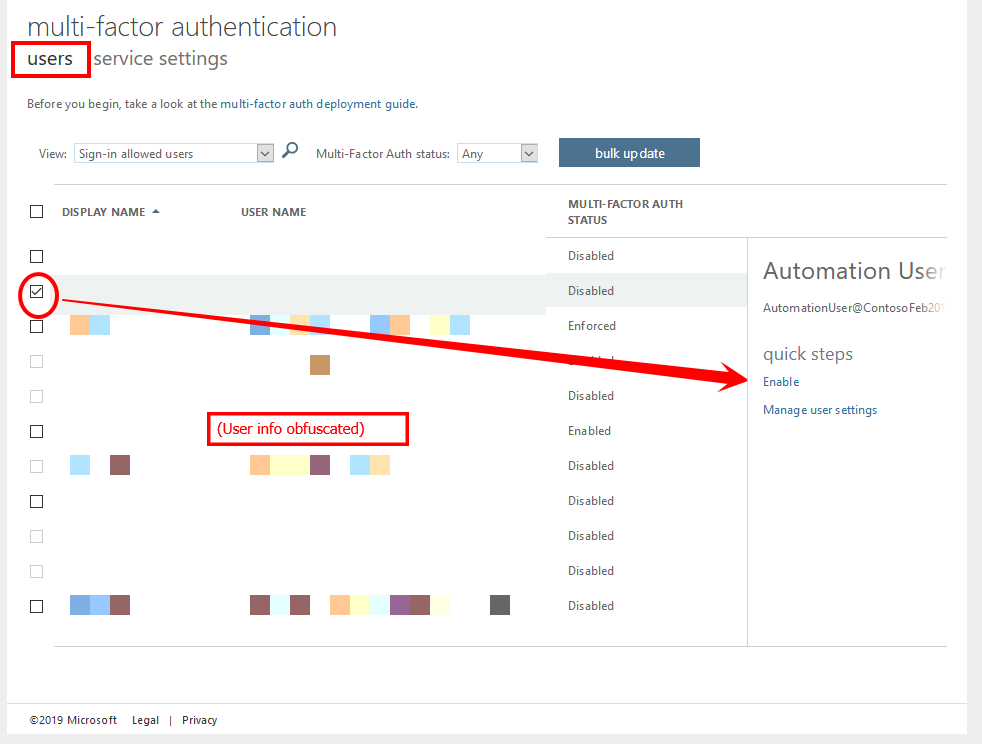
- From the Azure Active Directory blade, click Users, then choose Multi-Factor Authentication from the top menu to open in a new tab.
- Under the users choice, check the box next to the test user we created previously, then click Enable on the lower right.
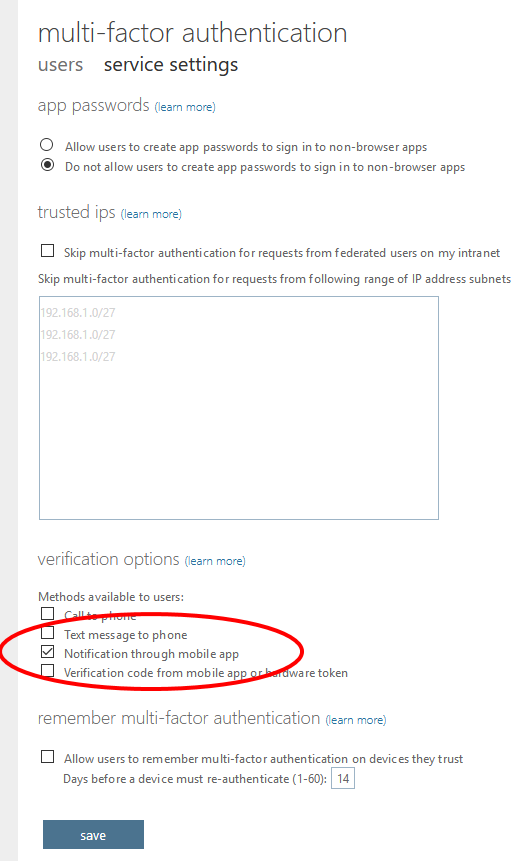
- Click the service settings menu, and check only the Notification through Mobile App choice under Verification Options.
- Test to verify that user sign-in and configuration of the Authenticator app is now required.
- Browse to the application in a browser/tab where you’re not already logged in as the admin
Disclaimers
- Screen shots and Available Azure functionality are current as of September 2019. The Azure UI changes frequently.
- No warranty is express or implied. This walkthrough may not meet the security requirements of your organization. As with all external code/configuration, do not use these instructions for production applications without filtering them through your company’s IT security policies.
No Comments Yet